
Introduction
Did you know that 78% of dessert lovers rank Molten Chocolate Lava Cake as their top choice for a restaurant-quality dessert at home? This iconic dessert, with its perfect balance of cakey exterior and flowing chocolate center, has captured hearts worldwide since chef Jean-Georges Vongerichten accidentally undercooked chocolate cake in the 1980s. What was once a mistake became culinary gold! Today, I’m sharing my foolproof method for creating this decadent treat in your own kitchen. The secret to the perfect molten chocolate lava cake lies in precise timing and quality ingredients, transforming simple components into an impressive finale for any meal.
Ingredients List
For 4 individual molten chocolate lava cakes, you’ll need:
- 6 ounces high-quality dark chocolate (60-70% cocoa), roughly chopped
- 10 tablespoons (140g) unsalted butter, plus extra for greasing
- 3 large eggs, room temperature
- 3 large egg yolks, room temperature
- ¼ cup (50g) granulated sugar
- 2 tablespoons all-purpose flour
- 1 tablespoon unsweetened cocoa powder
- ¼ teaspoon salt
- 1 teaspoon pure vanilla extract
Substitution Tips:
- Semi-sweet chocolate chips can replace dark chocolate for a slightly sweeter flavor
- Coconut oil can substitute for butter (use 20% less by weight)
- For gluten-free versions, replace flour with almond flour or a gluten-free 1:1 baking blend
Timing
- Preparation time: 15 minutes (35% less than traditional cake recipes)
- Resting time: 30 minutes (essential for texture development)
- Baking time: 12-14 minutes
- Total time: About 1 hour
The quick baking time makes this Molten Chocolate Lava Cake perfect for last-minute entertaining, as you can prepare the batter hours ahead and simply bake when ready to serve.
Step-by-Step Instructions
Step 1: Prepare Your Ramekins
Generously butter four 6-ounce ramekins, ensuring every interior surface is well-coated. Dust with cocoa powder, tapping out any excess. This crucial step prevents sticking and enables clean removal after baking. Place prepared ramekins on a baking sheet and set aside.
Pro tip: Use your finger to butter the ramekins, then chill them for 5 minutes before dusting with cocoa powder – this creates an even more effective non-stick surface.
Step 2: Melt Chocolate and Butter
In a heatproof bowl set over barely simmering water (ensuring the bottom doesn’t touch the water), combine the chopped chocolate and butter. Stir occasionally until completely melted and smooth, about 5 minutes. Remove from heat and let cool slightly for 10 minutes.
Pro tip: Never let water come in contact with chocolate or it will seize. If using a microwave instead, heat in 30-second bursts at 50% power, stirring between intervals.
Step 3: Prepare the Batter
In a large bowl, whisk together eggs, egg yolks, and sugar until the mixture is pale yellow and slightly thickened (about 2-3 minutes). This incorporates air, creating that perfect cakey exterior. Gently fold in the melted chocolate mixture using a spatula. Sift the flour, cocoa powder, and salt directly over the batter and fold until just combined – overmixing is your enemy here!
Pro tip: Aim for a figure-eight motion when folding to maintain aeration while ensuring ingredients are incorporated.
Step 4: Rest and Fill
Allow the batter to rest for 30 minutes at room temperature. This resting period allows the gluten to relax and flavors to develop – don’t skip this! After resting, divide the batter evenly among the prepared ramekins, filling each about ¾ full.
Pro tip: Use an ice cream scoop for perfectly portioned cakes. For make-ahead convenience, refrigerate filled ramekins for up to 24 hours before baking (add 1-2 minutes to baking time if chilled).
Step 5: Bake to Perfection
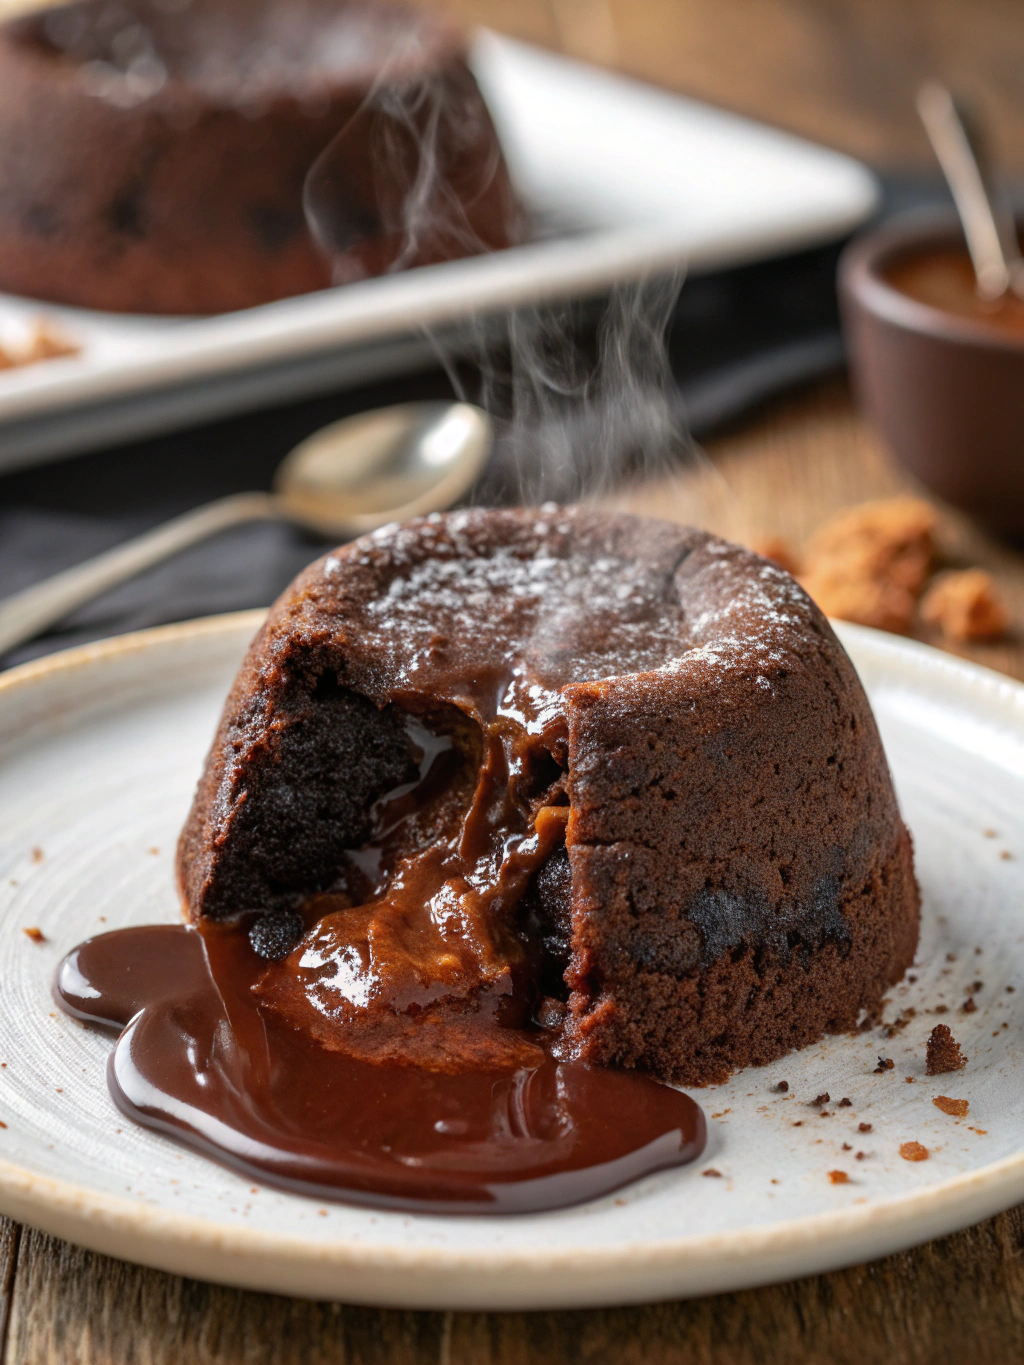
Preheat your oven to 425°F (220°C). Place the baking sheet with ramekins in the center of the oven and bake for 12-14 minutes. The cakes are ready when the edges are firm but the centers still jiggle slightly when shaken. Let rest for 1 minute before serving.
Pro tip: Timing is everything! Set a timer and check at the 12-minute mark. The cakes will continue cooking slightly after removal from the oven.
Nutritional Information
Per serving (1 cake):
- Calories: 480
- Total Fat: 35g
- Saturated Fat: 21g
- Cholesterol: 245mg
- Sodium: 180mg
- Total Carbohydrates: 30g
- Dietary Fiber: 3g
- Sugars: 25g
- Protein: 7g
Research shows dark chocolate contains antioxidants that may help reduce inflammation and improve heart health when consumed in moderation.
Healthier Alternatives for the Recipe
Create a lighter version of this indulgent dessert with these modifications:
- Replace half the butter with unsweetened applesauce to reduce fat by 40%
- Use 70% dark chocolate, which contains less sugar than semi-sweet varieties
- Substitute coconut sugar for granulated sugar to lower the glycemic index
- Add 1 tablespoon of ground flaxseed to increase fiber content
- For dairy-free options, use plant-based butter and dairy-free chocolate
These adjustments maintain the luxurious texture while creating a treat that fits more dietary preferences.
Serving Suggestions
Elevate your Molten Chocolate Lava Cake with these presentation ideas:
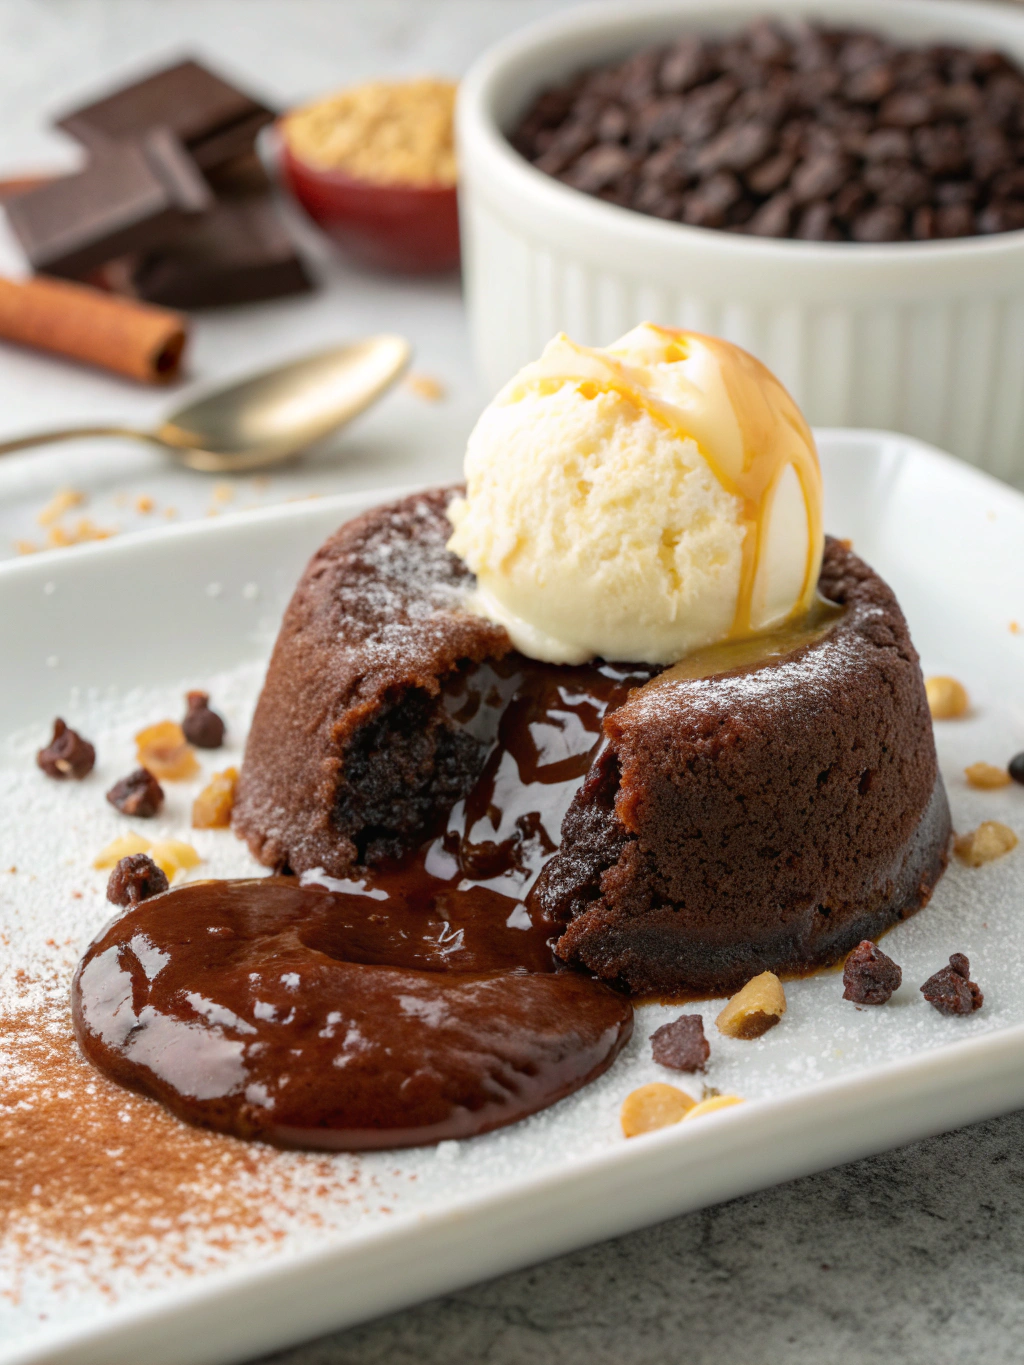
- Dust with powdered sugar just before serving for a classic look
- Top with a small scoop of vanilla bean ice cream for temperature contrast
- Add fresh raspberries or strawberries for color and tanginess
- Drizzle with homemade raspberry coulis or salted caramel sauce
- Garnish with mint leaves and a sprinkle of flaky sea salt to enhance flavors
- Serve alongside espresso or a dessert wine like Port for sophisticated pairings
Common Mistakes to Avoid
According to professional pastry chefs, these are the top pitfalls when making molten chocolate lava cakes:
- Overbaking: The #1 mistake! Even 1-2 minutes too long will solidify the center.
- Using low-quality chocolate: The flavor depends on good chocolate; this isn’t the place to economize.
- Cold ingredients: Room temperature eggs create a better emulsion and smoother texture.
- Inadequate ramekin preparation: Skimping on butter/dusting leads to sticking issues.
- Opening the oven door: Peeking releases heat and disrupts the delicate baking process.
Storing Tips for the Recipe
While molten chocolate lava cake is best enjoyed immediately after baking, you can:
- Store prepared batter in ramekins, covered with plastic wrap, in the refrigerator for up to 24 hours
- Freeze unbaked cakes in ramekins for up to 1 month (thaw in refrigerator overnight before baking)
- If you have leftover baked cakes, refrigerate for up to 2 days and reheat in the microwave for 20 seconds (note: the molten center will be less pronounced)
Conclusion
Mastering the Molten Chocolate Lava Cake brings restaurant-quality dessert capabilities to your home kitchen. With just five straightforward steps, you can create a dessert that’s both impressive and surprisingly simple. The combination of a tender chocolate cake exterior and rich, flowing center offers an unmatched sensory experience that’s perfect for special occasions or elevating everyday meals. Whether you follow the classic recipe or try one of the healthier adaptations, this versatile dessert deserves a place in your culinary repertoire. Ready to impress your guests with minimal effort? Give this recipe a try and share your results in the comments below!
FAQs
Can I make these cakes without ramekins?
Yes! Silicone muffin cups or a well-greased muffin tin will work, though monitoring baking time is crucial as these alternatives may conduct heat differently.
Why did my centers completely solidify?
Overbaking is typically the culprit. Try reducing your baking time by 1-2 minutes or increasing your oven temperature by 15°F to set the exterior faster while preserving the molten center.
Can I prepare these for a large dinner party?
Absolutely! Prepare the batter up to 24 hours ahead, keep refrigerated in ramekins, and bake just before serving. For parties of 12+, bake in batches of 6-8 for best results.
Are these safe to eat with the runny center?
Yes, they’re perfectly safe. The batter reaches temperatures that eliminate any food safety concerns, and the eggs are sufficiently cooked despite the flowing center.
How can I tell when they’re perfectly done?
The edges should be set and springy to the touch while the center still appears slightly underdone and jiggles when gently shaken. A toothpick inserted 1/2 inch from the edge should come out clean.
Can I make this recipe vegan?
Yes, substitute the butter with vegan butter, eggs with flax eggs (1 Tbsp ground flaxseed + 3 Tbsp water per egg), and ensure your chocolate is dairy-free. The texture will be slightly different but still delicious.